Difficulty: 7/10, With descent to crater: 9/10
Overall Rating: 4/5
Time: Summit and return: 3-4 hours, With decent to crater: 4-6 hours
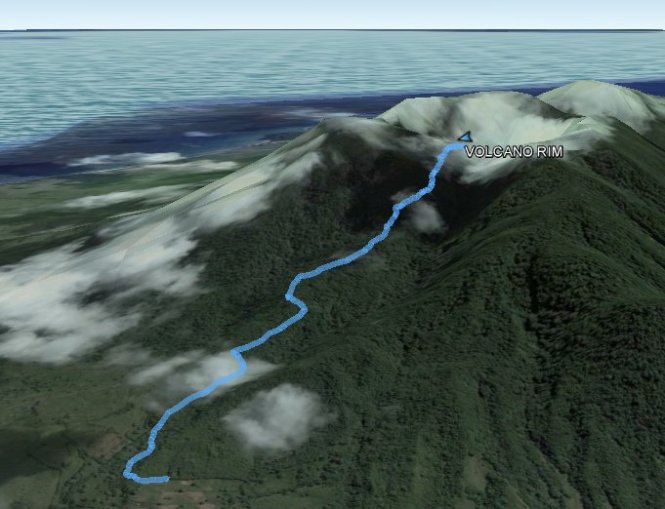
Elevation Gain: 650 m (2100 ft) (Parking area to crater rim)
Overview
Long steep incline with areas of gradual uphill walking. Rock climbing at the top for a great view inside the crater and out over the ocean. Dog do-able.
Getting There
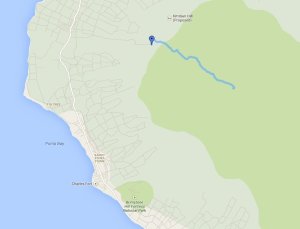
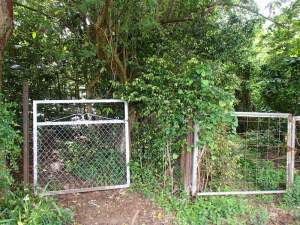
From Ross University, make a left (heading west) onto the island main road. Drive west/northwest passing Spratnet. About 5 to 7 minutes after Spratnet you will come to a fork in the road. Stay right. Proceed along island main road for another 5 to 10 minutes depending on rate of travel. You will see a sign for Mt. Liamuigi. Make a right onto the road immediately adjacent to the sign. Cross the train tracks and follow the road to the end. The trail begins through the left gate in parking area.
Smaller cars in good shape can usually make it, but if it has rained recently, there are several large mud puddles that you could get stuck in. It’s also a long, gradual incline, so be sure that your radiator is in good order to prevent overheating.
The Trail
The first third of the trail is a gradual incline with some stairs and rope handholds. The rope may seem unnecessary when it’s dry, but this section can get extremely muddy after large rainfall. We often call this the “warm up”. It’s not overly difficult but can be tiring.
The second third begins when you reach a riverbed and it becomes much steeper. Take care when returning that you follow the trail across the riverbed and not down. There are a few markers to remind you.
After climbing up a rocky riverbed, you will take a left turn up another fairly steep section. At the top of this, you will take another sharp left turn where the trail will start to flatten out.
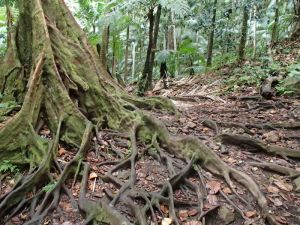
The final third begins with a short uphill section that levels out and actually starts going back down in parts. There are many large exposed tree roots so take care not to trip over them. After some time, you’ll reach the base of another rocky riverbed. You are nearly there! This final section is a steep climb up slippery rocks, but there are lots of handholds and places where you can stop and rest.
The Top
Once you reach the top, you’ll be able to see down into the crater through the trees. For a better view, turn left and head up the trail. There are two viewpoints with openings along the trail. For the best possible view, come back and turn right. Head up over, or around the large rock and follow the ropes. Climb up three rocks using the ropes to assist. This can be a bit tricky depending on how tall you are. You’ll then see a wooden ladder on your right. Take this ladder up and you’ll be on a tall, open rock ledge with an amazing view.
There are a few other places you can explore at the top. If you climb down a bit further from the main open rock ledge and look towards the sea, you’ll have a great view of the islands to the north, as well as the farmland below, giving a great impression of how high you’ve climbed.
You can also turn left at the ladder and climb (very carefully) along the rocks to get a similar view towards the northwest. If you are an extremely confident climber, light, and in good shape, you may be able to get around the back of the rock and find a small blue rope that will take you up even higher. This is not recommended unless you are with someone who has been up there before.
The Crater
For a more challenging hike, add climbing down into the bottom of the crater to see the pond, smell the sulfur, and feel very small inside a volcano! Add 2 hours time and leave the dog at home. Climbing into crater also entails some very steep descents down the crater walls on ropes. Getting down goes quickly (20 minutes), but be sure to save lots of energy and arm strength for the climb back up.
The trail starts right after you finish climbing the final rocky stream bed. You should see some ropes dangling down a very steep gradient. Going down, you can basically just lower yourself down the steep sections using the ropes. At writing time (Spring 2014) the ropes were in very good shape and most sections had backups.
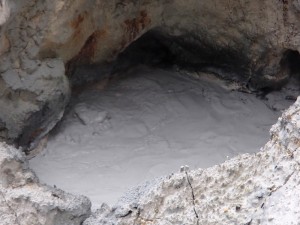
Once you reach the bottom, head straight towards the large rock pile. Be sure to pay attention to where you came down (and possibly mark it) as it’s often overgrown and could be difficult to find again. The water level in the crater lake varies significantly in different seasons. Sometimes there is no water at all, whereas during the wet season, it can become quite deep.
The Fumaroles
Fumaroles
Fumaroles are cracks or openings in the ground through which volcanic gases from beneath the Earth’s surface escape. Monitoring of fumaroles by analysing the gases and measuring temperatures may be useful in predicting volcanic eruptions. Volcanic gases may be hazardous to humans and animals and have in some cases caused death. Condensation of the gases into groundwater can result in alteration and dissolution of rock near the surface, making these areas prone to collapse or subsidence.
Volcanic gases
Gases such as sulphur dioxide (SO2), carbon monoxide (CO) and hydrogen sulphide (H2S) are present in toxic amounts close to the vent of an erupting volcano and/or may be emitted from fumaroles. One of the most common volcanic gases, carbon dioxide (CO2), is not poisonous but nevertheless, it is extremely dangerous. As it is heavier than air it tends to accumulate in hollows in the ground, displacing the breathable air. Since it is invisible and has no taste or smell, people and animals are unable to notice that it is there and may suffocate. People have died in this way at the Boiling Lake in the Valley of Desolation in Dominica.
Active fumaroles occur in the crater of Mt. Liamuiga, along the coast below Brimstone Hill and along the base of Brimstone Hill.
For more information, see: http://www.oas.org/pgdm/hazmap/volcano/stk_volc.htm
Getting to the Fumaroles from Where Trail Terminates at Base of Crater
Once you have reached the bottom of the crater you will emerge into a grassy plain area. Walk straight out into the crater for about 300 feet. Turn 90 degrees to your left and begin to walk towards the woods. Your goal is to make it to the edge of the crater wall behind the woods in front of you which will be partially visible from where you are standing. Once at the woods, find an opening and begin walking through that woods in a straight line towards the crater wall. There is no marked trail through this woods so be sure to pack a machete.
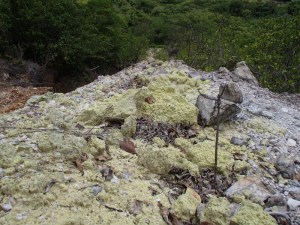
As you progress deeper into the woods you will notice three things; one, the size quantity of the sulfur chunks will increase; two, you may or may not begin to smell the pungent odor of sulfur; and three, a milky colored streambed which banks look like gray clay. Once you reach that streambed, follow it uphill. Eventually the streambed will lead you into a rocky clearing.
The larger more active fumaroles are up the left branch of the stream, you will hear them long before you see them. The ones at the bottom are the most majestic, there are ones further up but they are smaller and less active.
Also make sure to venture up the right branch of the stream as well. Although small, there is an exceptionally loud fumarole along that streambed that sounds like a teapot whistling.
Things to Keep in Mind While Visiting the Vents
1. The steam and gas escaping from the ground is superheated far beyond the boiling point for water, it will burn you instantly if you make any contact with it.
2. The gases in this region are toxic and can prove fatal if breathed in at high enough concentrations. Keep visits brief and if you feel any abnormal symptoms while visiting vacate the area immediately.
3. The ground in this region is also exceptionally hot. You will easily be able to feel the heat through any sneaker or hiking boot. Absolutely no open toed shoes of any kind can be worn while visiting this region.
4. Avoid slipping in this area. The ground is loose and it is easy to fall. It is also loaded with hot gas and superheated steam. Any skin that makes contact with the ground could be be burned immediately.
5. Do not put your hands or any other body part in, on, or around the water in the stream or near, the vents. You can get a very painful burn in a fraction of a second.
Overall, this is an awesome place to visit but it is also brutally dangerous. It can be visited and admired safely but that requires you the visitor to exercise extreme caution. If you would not do it within three feet of a campfire, do not do it here.
Map and GPS Points of Interest
Google Maps Engine Link: https://mapsengine.google.com/map/edit?mid=zPhxi0e6Ldgs.kPhLh8XXGxRY
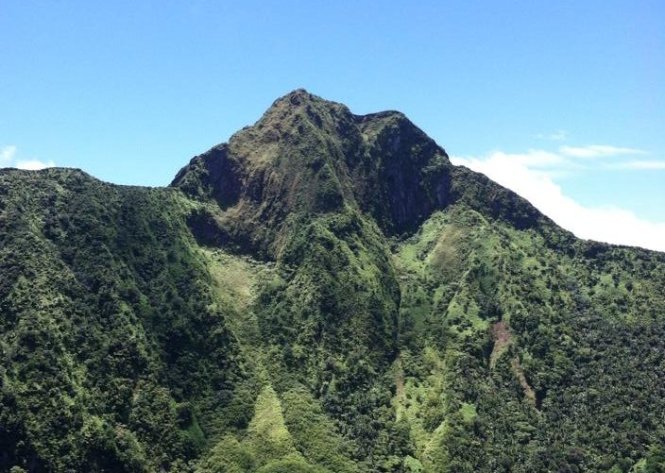
Did this hike a few days ago and it was amazing! Its not as hard as people make it seem but be aware its more of a climb than a hike. The dirt road leading to the volcano is NOT accessible via sedan or small car and definitely need a 4×4 vehicle especially if it rained the night . If you are going via sedan then park your car where you see a large house on your left after you started the dirt road towards the volcano and walk the rest of the way up. (will add 30 min easy walk to the trail head). You DO NOT need a guide! the trail is well marked with pink and orange ties on the trees and large orange arrows so pay attention and you will not get lost. There are ropes along the way to help with the climb. The entire hike is under canopy so no need for sun screen, hats, etc. Bring spare socks with you and a rain coat, many parts or in the river bed and if it rained recently it will be wet and muddy and your socks will get wet unless you have decent hiking boots. Try to go when there are minimal clouds because it can often block the view of the crater on the top. Read the instructions above and the best view point is indeed the path to the right and up the ladder. I didn’t go down the crater. Bring plenty of water and food, change of shirt after you reach the top and a rain coat. It can get cold on the top. It took me 2.5 hours to get up and 1.5 to get down. Take time to enjoy the way up it really is beautiful. Every one who did the guided tour paid 100$ USD said the pace was too fast, only got a small sandwich and had 15 min on top and were forced down so do yourself a favor and go with some friends, no guide and have fun. FB me at jonathan david schlossberg if you have questions. will be here until 2019.
Cheers.
Just did the hike last week. Here are my thoughts to add…
1) We came in on a cruise ship and got a rental car (Avis is located a few mins walk from the port). GPS and Jonathan’s directions above made finding the trailhead fairly easy. Definitely agree that you’ll want to rent a 4×4. The dirt road leading to the trailhead is awful. They are starting to pave it \who knows how long that will take.
2) I agree that you do not need a guided tour and am glad we did it ourselves. However be extra careful on the way back down (the way up didn’t give us any trouble). We wandered off the trail twice but noticed pretty quickly and were able to back track to our mistake. Keep checking for the tree ties.
3) Hiking boots strongly recommended. The roots and rocks are slippery, even without recent rainfall.
4) We didn’t notice much of a temperature drop at the top. This could have been because our body temps were so high at that point, but we were very comfortable in lightweight long sleeve shirts and pants (which are what we wore the entire time).
5) My husband and I are very active (exercise 5x/week) and would consider this a 8-9/10 difficulty WITHOUT decent to the crater (however, we are not very experienced hikers). It took us 3 hrs up and a little under 2 hrs coming down (although as stated above, we got off course twice). I agree with Jonathan’s comment above “this is more of a climb than a hike.” We were very sore the next day. However, the view from the top is 100% worth it and we would absolutely do it again.
Thanks for the map data! Did the hike 6/3/17 and had a great time. Definitely do not need a guide but do take plenty of water. The road leading to the trailhead is now paved and is easily passable. We took a bus for Basseterre and were dropped off at “De Pumpkin”. It was about a 25 min walk to the trailhead from there….not bad. The trail is well marked with tree ties and water bottles along with a well beaten path from many other hikers. The top third of the trail begins to get steep but nothing too treacherous. Take the ladder at the top for a great view and nice spot for lunch. Thanks SKNtrails!
I did this hike last weekend and it was a wonderful hike. The trail was quite good to find and was properly accessible at most points. It is a tiring hike for sure and you will need to climb and clamber your way up at some parts. So a certain fitness is required. We two young man in their twenties, did the way up in about 2 hours and the way down in 1h40 or something. Quite some markers were found, but without them you will find your way up as well. It was a little cloudy on the top, but the view inside the crater and around was magnificent.
We decided to check and see if we could go down the crater and we did. The ropes were in a quite good state, which was good, because you really need them, however you should also use the tree stems and roots. The descent is certainly not without any risk and you have to watch out where to put your feet. The descent took us about 40min and was really adventurous. Down in the crater we found the crater lake, which made it difficult to walk around there. The way up was easier, as climbing up usually gives your a better balance, it took us 30min to go up. You will need some strength, but you don’t have to be a beast to come up, as long as you are comfortable with climbing and positioning hands and feet and not afraid to take some risk, you can make it.
Going down from the top is relatively easy, but will take you quite some time and may be a little boring at times.
If you are fit and it is not a too rainy or cloudy day I would definitely recommend this hike and if you want some more adventure and fun, you could go down the crater too!
Just commenting to let everyone know that once you reach the top of the trail, the ladder to the viewpoint on your right is completely destroyed. The scenic view up top to your right is still reachable, just be prepared to do some rock climbing. I wouldn’t recommend it for kids/the elderly though; it is a pretty big leap up without the ladder.
The viewpoint on your left is still perfectly untouched and accessible though!
Hiking to the crater at Mount Limiagua is always an enjoyable journey. The soil is usually a bit moist, so be prepared for a fall or two.
Gorgeous hike with great views. Keep your eyes peeled for monkeys in the forest. Was a little worried about finding the trailhead, however our taxi driver took us straight there without any problems and picked us up there afterward. Trail is easy to follow and if it seems like 2 paths diverge, they end up meeting up again. Didn’t end up hiking into to the crater due to time constraints, but it looked to be essentially straight down, requiring the ropes to get down and heave yourself back up on!
I did it a week ago with pleasure. Just up the rim, no crater descent. It took me 2 hrs up and 1 hr 40 min down. There was no problems with finding the path, it is well marked. Unfortunately no scenic views were seen as it was cloudy with rain showers. The climb up is not easy physically, but the descent is much more challenging especially in wet conditions. You have to be very careful as the path is slippery. Double check every step. As it was mentionned in the previous comments don’t forget proper hiking boots, a raincoat, spare socks and t-shirt, plenty of water of course. As a bonus I gathered a large bag of wild mango on the way back, the taste is great! Hope to repeat it next time with crater descent in better weather conditions.
Just chiming back in to say the ladder at the right viewpoint has been replaced! Good as new.